How to Calibrate a Pressure Transmitter: A Field Procedure
Your transmitter reads a little high, the annual due-date came up, or a new loop needs a first check before start-up. Whatever brought you here, you want the same thing: a calibration you can actually follow, with the numbers that tell you whether the instrument passed. This guide walks through that procedure for a standard 4-20 mA pressure transmitter, and it settles the one thing crews get wrong most often: treating a re-range as a calibration.
What Calibration Actually Means for a Pressure Transmitter
Calibration is not “looking at the reading and deciding it seems about right.” You apply a known pressure from a reference standard, you compare the transmitter’s output against what that pressure should produce, and you record the difference. Three things happen in order: you test (apply pressure, read the output), you adjust only if the error is out of tolerance, and you document both the before and after results.
That order matters. If you adjust first, you destroy the As-Found evidence that tells you how far the instrument had drifted, which is exactly what a quality system, a pressure transmitter spec, or a safety audit wants to see. Test, then adjust, then document. Never the other way around.
Re-Ranging, Re-Calibrating, and Trimming Are Not the Same
This is the mistake worth stopping for. On a smart or HART transmitter, you can change the range, the zero, and the span from a handheld without applying a single pound of pressure. That is re-ranging, and it is not calibration. It tells the transmitter what 4 mA and 20 mA should mean. It does nothing to correct a sensor that has actually drifted.
| Action | Pressure applied? | What it changes | Counts as calibration? |
|---|---|---|---|
| Re-range | No | The 4-20 mA span endpoints (mapping only) | No |
| Sensor trim | Yes (reference standard) | Corrects the sensor’s pressure reading | Yes |
| D/A trim | Yes (read mA) | Corrects the 4-20 mA output vs the internal value | Yes |
So when a transmitter is off, decide what is actually wrong. If the digital pressure value is correct but the milliamp output is off, you need a D/A trim. If the pressure value itself is wrong, you need a sensor trim against a reference. Re-ranging a digital smart transmitter is a fine way to rescale a loop. Sign it off as a calibration, though, and the sensor keeps drifting while the record says the instrument is fine.
What You Need, and the 4:1 Rule
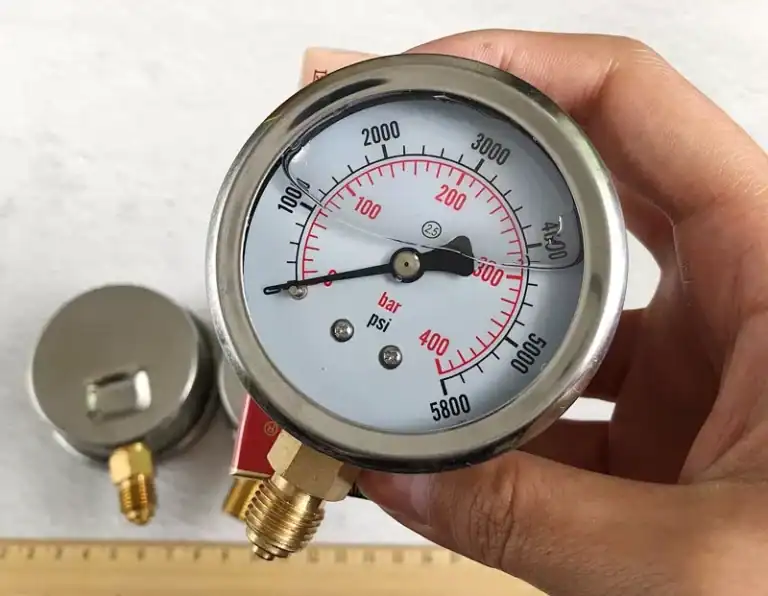
You can keep the kit short. A pressure source and a hand pump (or a deadweight tester for higher accuracy), a reference standard to read the applied pressure, a precise multimeter or loop calibrator to read the milliamps, and a 24 VDC loop supply. For a HART instrument, add a communicator.
Get one ratio right and the rest follows: your reference standard should be at least four times more accurate than the transmitter you are checking. Below that 4:1 test accuracy ratio, you cannot separate the transmitter’s drift from your own equipment’s error. If your transmitter is rated 0.1% and your standard is only 0.1%, you cannot honestly tell pass from fail. Keep the standard NIST-traceable, and follow recognized calibration practice from bodies such as the ISA and the IEC for documenting it.
Should You Calibrate in the Field or on the Bench?
Both are valid, and the right call depends on what you need from the result. Field (in-situ) calibration is faster and keeps the transmitter in its real conditions, so it suits routine checks where you can isolate the process and apply a test pressure at the manifold. The bench is the better choice when you need a reference-grade result, when the instrument feeds a custody-transfer or safety function, or when you are changing the range and want a clean record.
A reasonable rule: check it in the field if you can isolate it safely and your standard fits the job; pull it to the bench when accuracy, arbitration, or paperwork demands a controlled environment.
The Five-Point Procedure: As-Found and As-Left
Five points across the range catch errors that a two-point zero-and-span check will miss, because they expose non-linearity in the middle. Walk the range up and back down so you also see hysteresis, the small gap between the rising and falling readings.
- Isolate the transmitter and connect it to your reference standard and loop readout.
- Apply 0%, 25%, 50%, 75%, then 100% of the range, recording the output at each step. This is the As-Found data, before you touch anything.
- Step back down: 100%, 75%, 50%, 25%, 0%, recording each point. The up-and-down pair is your hysteresis.
- If every point is within tolerance, you are done. Record it and move on.
- If any point is out, correct zero first, then span, then re-check. A sensor trim handles a reading that is wrong across the board. Repeat the five points and record the As-Left data.
Always keep both records. As-Found proves how the instrument was performing in service; As-Left proves the condition you left it in. The same five-point logic applies when you calibrate a differential pressure transmitter, with one extra step covered below.
What Each Point Should Read in Milliamps
Here is the part the equipment vendors leave to their own software. A 4-20 mA transmitter is linear, so the output for any pressure follows a simple relationship: mA = 4 + 16 × (applied pressure ÷ span).
Take a transmitter ranged 0-100 psi. The span is 100 psi, so 50 psi is 50% of span and should read 4 + 16 × 0.5 = 12 mA. The full five-point table looks like this:
| Range point | Applied (0-100 psi) | Ideal output |
|---|---|---|
| 0% | 0 psi | 4.000 mA |
| 25% | 25 psi | 8.000 mA |
| 50% | 50 psi | 12.000 mA |
| 75% | 75 psi | 16.000 mA |
| 100% | 100 psi | 20.000 mA |
Want the figure for any odd range or pressure without doing the arithmetic by hand? Use our 4-20 mA output calculator and read the target milliamps straight off. The same linear relationship is what every 4-20 mA loop runs on, so the math here carries over to flow, level, and temperature loops too.
Reading Pass or Fail: Error as Percent of Span
A milliamp reading on its own does not tell you pass or fail. Convert the error to percent of span: error (% span) = (measured mA − ideal mA) ÷ 16 mA × 100.
Say the 50% point should read 12.000 mA and you measure 12.050 mA. The error is 0.050 ÷ 16 × 100 = 0.31% of span. If the transmitter is a 0.1%-class instrument, the kind of accuracy you would expect from a high-accuracy transmitter, that point fails and it is time to trim. A 0.1% span tolerance on a 16 mA span is only ±0.016 mA, which is why a sloppy readout or a weak reference standard will sink you before the transmitter ever does.
How Often Should You Calibrate?
Once a year is a starting point, not an answer. Set the interval from three things: the drift history of that model and tag, how critical the loop is, and the tolerance you have to hold. A transmitter on a safety or custody loop earns a shorter interval; a non-critical utility reading can stretch longer. Let the As-Found records make the decision for you. If a tag keeps coming back in tolerance, stretch the interval. If it drifts, pull it in. Let the records set the schedule, not the calendar.
Five Mistakes That Ruin a Good Calibration
On more than one start-up we commissioned, a transmitter that passed its bench check still read high in service, and the cause was almost never the transmitter. Watch these:
- On a differential pressure transmitter, not venting both sides together to atmosphere before zeroing, which leaves a false offset.
- Ignoring the liquid head in a wet leg or a filled impulse line, so the zero is corrected for a column that is really there.
- Zeroing on the bench, then mounting the transmitter in a different orientation, which shifts the zero by the weight of the fill fluid.
- Letting the calibration temperature differ from the working temperature and blaming the drift on the sensor.
- Trusting a reference standard that is not 4:1 better than the instrument under test.
None of these show up as a bad number on the bench. They show up a shift later, once the transmitter is back in service, which is why the procedure on its own is never enough.
Frequently Asked Questions
How are pressure transmitters calibrated?
You apply a known pressure from a reference standard at several points across the range, compare the transmitter’s 4-20 mA output to the ideal value, record the As-Found result, and adjust with a zero, span, or sensor trim only if a point is out of tolerance.
How often should a pressure transmitter be calibrated?
Annual is a common default, but the right interval comes from drift history, loop criticality, and your tolerance. Safety and custody loops get checked more often; stable utility loops can run longer. Let the As-Found data set the schedule.
What are the four types of calibration?
In practice you work with zero, span, linearity (the multi-point check that catches mid-range error), and, on smart instruments, the digital trims that correct the sensor and the 4-20 mA output.
How do you calibrate a 4-20 mA transmitter?
Apply 0%, 25%, 50%, 75%, and 100% of range, and confirm the output reads 4, 8, 12, 16, and 20 mA within tolerance using mA = 4 + 16 × (pressure ÷ span). Trim if a point is out, then record As-Left.
Is re-ranging a HART transmitter the same as calibrating it?
No. Re-ranging changes the 4-20 mA endpoints without applying pressure, so it cannot correct sensor drift. Only a trim against a reference standard is a calibration.
Specifying a transmitter that holds its calibration?
Tell us your range, accuracy class, and process conditions, and we will return a one-page recommendation with the right HMK pressure transmitter for the loop, plus the calibration points you should hold it to.